2010-05-31 Installing TNG on Windows
web app on Windows
web app
The Next Generation of Genealogy Sitebuilding (TNG) is a web application. It was designed to run on a web server, and to be used through web browsers.
There a several good reasons why you may to install TNG on your own Windows
PC. Installing locally allows you to use TNG as your desktop genealogy
application.
One reason to make TNG your desktop app is to have the same genealogy
application on your desktop and on your server. Another is to try out
configurations and customisations without annoying your web visitors. Installing
locally allows you run a TNG server without paying for web hosting, or to start
using and learning TNG without immediately having to pay a web host.
prerequisites
TNG was written for a web server, so to install it on your Windows PC, you
need to provide that web server on your Windows PC.
The TNG FAQ starts by listing TNG’s requirements, it says that need to have PHP
and MySQL on your web site. Now, if you read that quickly, you may think merely
lists two requirements, but it also implies a third one. The zeroth requirement
is that a host must be a website, and it only is a website if it is running a
web server such as Apache.
The FAQ notes that you need an FTP client on your desktop to upload files to your host, but omits the fact that the host needs to be running an FTP server for the file transfer to work. Some way of transferring files is only needed during installation, and practically every host web runs an FTP server. Once installed, TNG does not require an FTP server to work.
TNG expects the Apache web server, the MySQL database system and the PHP scripting language. You need to take care of those three things before you try to install TNG itself. I took care of all three at once by installing WampServer, as discussed in WampServer.
download
There is a demo of a fully working site, but there is no 30-day trial. When you decide to buy TNG, you get a username & password to access the download area, where you can download both the current version, recent updates and the last release of the previous major version. Each download is a ZIP file which you must unzip and then install on your web server.
I downloaded TNG version 8.0, released on 2010 May 28. According to the TNG web site, one of the main improvements of version 8.0 over version 7.0 is easier installation.
The file tngfiles800.zip is less than 4 MB large. That file contains all you
need to get up and running, but there is a lot more to download. The download
pages says to open readme.html for installation instructions.
There are add-ons for integration with popular blogging systems such as WordPress, Joomla and Drupal. Support for these add-ons is provided by the third parties that created these.
I initially downloaded some language files, because I thought I had too, but with TNG version 8 there is no need to do so. All the language files are included in the base product. The ability to download the language files separately has been retained so that updated language files can be downloaded without having to download the entire product again.
You should download the PDF fonts UTF-8
(utf8fonts.zip). These font are not included in the base package.
ReadMe
The tngfiles800.zip file contains installation instructions in
readme.html.
The ReadMe is organised into several sections, with a navigation bar on the
left. That navigation bar seems to have links to several sections, but when I
clicked those, nothing happened. That is because it these are not regular links,
but scripts. I use Firefox’s NoScript add-on and Google Chrome’s recently
introduced built-in JavaScript blocker to block scripts by default.
I don’t know why this page uses JavaScript links when regular links are simpler, shorter and faster, and you cannot rely on JavaScript being available. However, even if this web page used regular links as it should, you’d still need to enable JavaScript, as the installation guide uses it to perform installation tasks. The installation guide is not just an installation guide for you to read, but also your installation tool.
overview
Compared to the typical Wizard-driven installers common on Windows, TNG installation may seem needlessly complex. Then again, compared to the typical command-line installation of server-side database applications, TNG installation is rather simple. There is no need to type complex command lines with just the right syntax. Scripts that you’d normally execute manually are triggered by buttons in the installation guide. All you need to do is make a few choices, fill in a few edit boxes and click a few buttons. Well, you also need to use one other tool to create a database.
The installation guide provides a choice between Express Installation instructions and Regular Installation instructions. The Express Installation makes it very clear that you need to take a number of step in a particular order:
- copy all TNG files to your site
- continue reading the guide from the site
- set permissions
- rename folders
- choose language and character set
- establish a database connection
- create database tables
- create a TNG user
- Create a Tree
0. Arrange a Web Server
The TNG installation guide starts numbering the steps you need take at 1 because it assumes you’ve already taken step zero: arrange a web server to install TNG on.
The TNG installation guide assumes that your web server with Apache, MySQL and PHP is already up and running. It provides no instructions for installing these.
This text assumes that you have some WAMP bundle, such as WampServer
installed. WampServer installation is discussed in the WampServer
article.
Be sure to start it and surf to http://localhost/ to
verify that it is up and running fine before proceeding with the other steps.
1. copying all files to your site
The Express Installation instructions provide a good overview of the steps you need take to install TNG,
but does not mention the step you need take before reading the guide; unzip
tngfiles800.zip into a directory. Then again, if you had not
performed that step already, you probably would not be reading the guide…
The first step is to copy all TNG files to your site. The installation guide says that you should use an FTP client to do so. If you don’t know how to use an FTP client, then TNG probably isn’t for you, but an FTP client will only work if the host is running an FTP server, and WampServer does not include an FTP server. Now, you could install some FTP server, for example Apache FTP, and then use FTP to upload the files, but when you install TNG locally, there is no need to do so. You can simply drag & drop the entire TNG directory from the download folder to the web folder.
web folder
I installed WampServer in P:\WAMP. The WAMP
directory has several subdirectories, including a www directory.
The WAMP\www directory is root directory of the web server. The
lonely file in there, index.php, is WampServer’s home page.
copy & unzip
The installation guide says can install TNG in the root folder or a
subfolder, as you like. I decided to install TNG in a subdirectory named TNG8,
so all files ended up in the directory WAMP\www\TNG8.
To do so, I copied tngfiles800.zip from the Downloads
folder into WAMP\www, unzipped it into a subdirectory, which was
automatically named tngfiles800 and then renamed that subdirectory
to TNG8. That shorter name is not only appropriate for all TNG 8.x
versions, it also helps to avoid accidental overwriting if you unzip
tngfiles800.zip again.
The installation guide says to unzip on your PC and then upload the files. So, if you follow the installation guide, the ZIP file will not be on your web server. For a local installation to experiment with, keeping the ZIP file around may be handy, but there is no need to keep in the web server’s root directory. It serves no function there, and you should keep your web server as clean and simple as possible, so you should delete it.
2. continue reading the guide on your site

You need to continue reading the installation guide on your site. This is because it contains scripts that perform various actions on your site.
Once all files are copied into P:\WAMP/www/TNG8, the
installation guide is at
WAMP/www/TNG8/readme.html. As P:\WAMP\www is the web
server’s root, it is also at http://localroot/TNG8/readme.html.
You do not need to type the entire address. If you surf to
http://localroot/TNG8/, the TNG home page will automatically redirect you
to http://localroot/TNG8/readme.html.

You do not need to type that address at all. Once you’ve installed TNG into
the TNG8 subdirectory, the WampServer home page will show the TNG8 subdirectory
as a project. You can click on that to start reading the TNG installation guide
from your site.
The TNG installation guide requires JavaScript privilege. If you are
browsing safely, you need to allow JavaScript. The screenshot shows how to
enable JavaScript when you are using Chrome’s built-in JavaScript blocker.
Notice that you do not allow JavaScript for just the readme.html
page, but for the entire localhost site. You would have needed to
do so later anyway, as TNG 8 is still heavily dependent on JavaScript, and does
not look good without it.
3. set permissions
When you upload files to a web server, the server sets some default permissions on these files, typically the right to read (r) the files. The TNG application is a large collection of PHP scripts, and for those to work, these scripts need permission to execute (x). Some other files need write (w) permissions. More details about the necessary permissions are installation guide.
The installation guide has a Set Permission
button. That button
calls upon a JavaScript function to set the necessary file permissions.
None of this really matters when you install TNG locally to run privately. Windows’s default permissions work just fine. It is okay to skip this step.
PHP configuration
Well, there is one issue that you do need to pay some attention to. The Express
Installation skips this step, but it is addressed by Regular Installation. The PHP configuration is controlled by the PHP.INI
file and there are three configuration values in the PHP.INI
file that you need to check and possibly modify.
First of all, error_reporting should be set to E_ALL &
~E_NOTICE, the default value. That value tells PHP to show all errors
except E_NOTICE
level errors (warnings).
The two other configuration values affect file uploading. It important to
ensure that file_uploads = On, or you will not be able to upload a
GEDCOM to TNG at all. However, even when file_uploads = On,
upload may still fail because a PHP restricts the maximum upload size. The
default value for upload_max_filesize
is just two megabytes, and that is likely to be too small. The largest GEDCOM
file I know about (see Two Huge GEDCOM Files) is roughly 600 MB, so
a maximum size of 1 GB seems plenty. You can choose a smaller maximum, but avoid
very small values, even if your GEDCOM is still tiny. Your GEDCOM will increase
in size, and you probably want to upload some multimedia files too.
WampServer
WampServer has a menu item to open the PHP.INI file. It contains the line
error_reporting = E_ALL, so that must be changed to
error_reporting = E_ALL & ~E_NOTICE.
The PHP.INI file contains the line file_uploads = On already, so
that does not need to be changed, but it also contains the line
upload_max_filesize = 2M, so that should be changed to
upload_max_filesize = 1G.
4. rename folders
TNG uses a bunch of subfolders to store stuff in. These folders have pretty
logical names. It is recommended that you rename at least the gedcom
and backup folders.
This a security precaution. The default TNG folder names are widely known, and unless you have taken precautions, anyone who knows a directory name can surf to that directory, for example to download your GEDCOM file. Renaming the directories is one of the things you can do to thwart that scenario, and that is why the installation guide makes it easy to rename them.
Once again, because you are running locally, security isn’t big a concern. For a private local installation that you do not intend to upload to a public server, the default names are just fine. It is okay to skip this step.
5. choose language and character set
Step five is a step you should not skip. To support multiple languages, the early versions of TNG supported multiple code pages. Nowadays, TNG supports Unicode, so there is no reason to use code pages and suffer all the limitations that come with these.
Although previous versions already supported Unicode, TNG version 8 still does not default to Unicode. TNG 8 still defaults to ISO 8859-1, also known as ISO Latin-1. That is a standard character set, but one that contains less characters than Windows ANSI does (Windows ANSI is a superset of ISO Latin 1). This means that it cannot even handle the 217 different characters that may occur in so-called ANSI GEDCOM files. Some of the Windows ANSI characters you are most likely to miss in ISO Latin-1 are Œ & œ, Š & š, ÿ and Ž & ž.
Whatever user interface language you choose, you should opt for the UTF-8 encoding, so that your installation of TNG can handle any Unicode character. You must choose Unicode if you want to integrate TNG with Joomla, and it is likely that other integration possibilities will demand UTF-8.

TNG 8 defaults to using the English language and ISO-8859-1 character set. To change that to English and UTF-8, you need to choose the English (UTF-8) language file, as shown in the screenshot.
PDF fonts
TNG has support for UTF-8 in Adobe PDF, but the fonts you need for that are
not included in the base package. You do need to download and install the PDF fonts for UTF-8 (utf8fonts.zip).
The installation guide mentions the existence of these fonts, but lacks
installation instructions, but it is not hard.
When you unzip utf8fonts.zip into the automatically named directory utf8fonts,
you will notice that it has a subdirectory structure similar to the already existing
TNG subdirectory font. You should rename the utf8fonts
(plural) directory to
font (singular) and then copy it into the TNG folder, thus merging
it with the already existing
font subdirectory.
The next update of TNG does not to add instructions for installing these fonts to the installation guide, it should include the fonts in the base package. That simplifies installation.
6. establish a database connection
This is really two steps in one. First, we must create a database in MySQL, then we must create the database connection, the settings that TNG will use to connect with MySQL.
6a. Create a database
settings
You should create a Unicode database using the UTF-8 encoding and the
utf8_general_ci collation sequence. The ci
part of utf8_general_ci collation
stands for case-insensitive.
web host
When install TNG on some third-party web host, the owner may create an MySQL database for you, perhaps using your username as the database name. TNG does not need a particular database name, but you do need make sure they make a Unicode database for you.
WampServer
The installation guide has no button for creating the database. This we must
do ourselves. In WampServer, we can do so using either MySQL console or
phpMyAdmin. The phpmyadmin
link on the WampServer home page leads to the
phpMyAdmin home page, where you can perform the Create new
database
action.

The screenshot shows creation of a database called tngenea, with
the UTF-8 character encoding and utf8_general_ci collation
sequence.
The column on the right shows that the UTF-8 encoding is the default, and the
MySQL connection collation already defaults to utf8_general_ci. You
should pick the same collation sequence for the database. You should generally
avoid language-specific collation sequences, but may you want to consider the
somewhat slower utf8_unicode_ci collation sequence, especially if
you have German names, as it will compare ß
and ss
as equal.
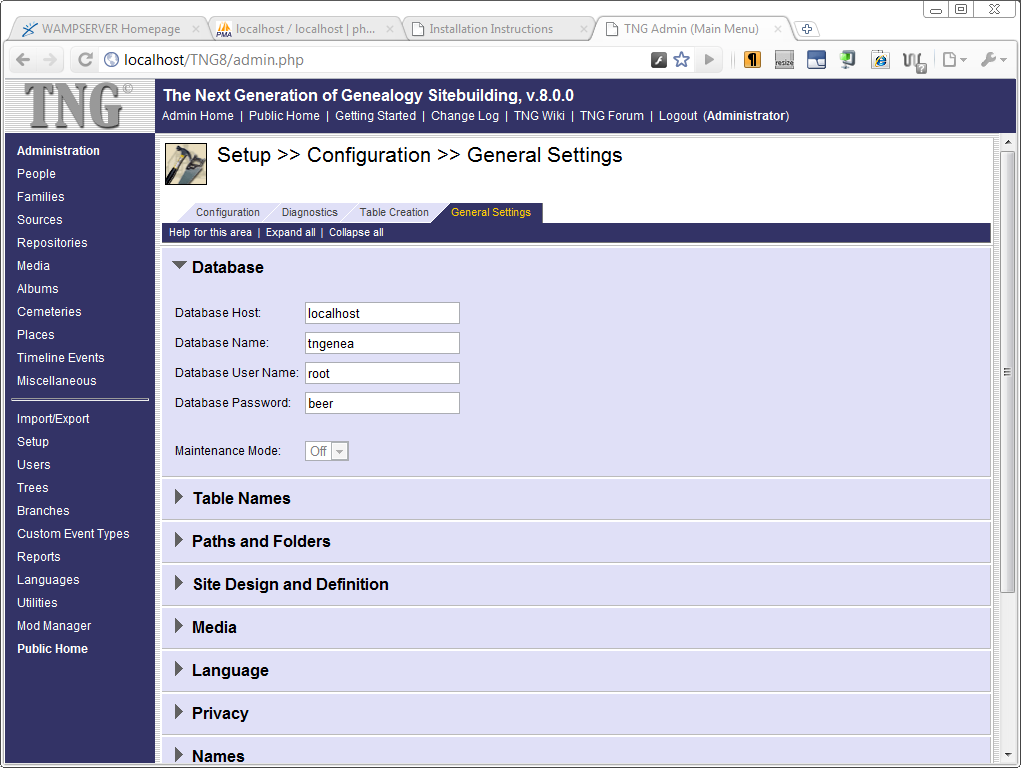
6b. establish a connection
| parameter | value |
|---|---|
| host name | localhost |
| database name | tngenea |
| user name | root |
| password | beer |
Establishing a connection to the database is a matter of collecting the necessary parameters to fill in the edit boxes.
The table shows the values I used for the local database. I kept things simple by using the local administrator account to access to the database. That is something you can get away with for a local installation. In general, web applications should get their own database user account with a minimal set of privileges. It matters little for TNG, as TNG demands an account with full privileges anyway.

When you click the Save and Verify
button, TNG runs a script to create the connection.
I was surprised to receive a message in German, but it is a success message; Information wurde gespeichert, Datenbank-Verbindung wurde überprüft, neue
Datenbank wurde angelegt: tngenea
means Information is saved; database connection has been checked; new database was created
.
I was surprised to receive a German message, and have no idea why that
happened, but the green colour of the message is all you need to understand;
green means success.
When I first visited the Admin page, I found that it was in German. So it
seemed that I had opted for a German installation instead of an English one. I
went back to the language selection, choose English, and the Admin page was
English.
Do notice the What might cause this operation to fail?
section. It
list the most likely reasons for failure to create the connection.
Once you have created the databases, you can follow the link to the TNG Admin page, to check that the database connection has been saved in your TNG General Settings.
By the way, if you try to visit the Admin page before establishing a
database connection, the page will remain empty and at this stage of
installation, most menu items will result in an error. The next installation
step resolves that.
7. Create database tables
Creating the database tables is as simple as it gets; just click the Save and
Create
button. You are allowed to change the table names before clicking the
button, but it is unlikely that you have a good reason to do so.
The installation guide is meant to be used for creating new databases, but
still contains a warning; If you created the tables previously, doing this will
erase ALL of your existing TNG data!.

The screenshot shows the success message The tables have been created!,
but in case
creation fails, there are some troubleshooting tips below the Save and
Create button.
Now that all the tables have been created, TNG Admin should work fine and produce any errors any more. There are many settings you can change there, but none that needs to be changed to continue with the next step.
8. Create a TNG user
You must create at least one TNG user, and the first user must be an
administrator. The administrator must have Add, Edit and Delete rights, and may
not be assigned to any particular Tree
.
If you do not create a user, TNG remains wide open to every visitor. All visitors will see the Administrator menu and be able to view private data. Once you have created a user, TNG will start distinguishing between administrators and visitors.
Although a local setup does not strictly need the distinction between administrator and visitor, it remains good practice to set an application up as it was intended to be set up.
The TNG Admin interface allows to specify permissions. The installation guide
has a button that will create an administrator. Just choose a name and password,
and fill in the other fields. I created a user named admin, , through
the installation guide and then checked the settings on through the Admin pages.

If you browse to the TNG home page now, you are no longer redirected to the help
file, but get to see the normal TNG home page instead, which is easily the most
boring page in the entire TNG package. That is not without reason; along the
bottom of the page is the text Please customize this page!
.
9. Create a Tree
A single TNG installation can be used to manage multiple projects. TNG calls each such project a Tree. When you create a TNG database, there are zero Trees. Before you can import any data, you must create a Tree.

The installation guide does not want just a tree name, it wants a tree
identifier and a brief description. TNG calls these two fields the Tree ID and
the Tree Name. The installation guide suggests the Tree ID tree1 and the Tree
Name My Genealogy
, not the most inspiring choices.
As I can delete and create Trees as much as I want, I started with Tree ID test1
and Tree Name Just playing around
.
10. Import some data
The Express Installation does not list a tenth step, but really now,
once you have TNG up and running, you want to confirm that it works by importing some data.
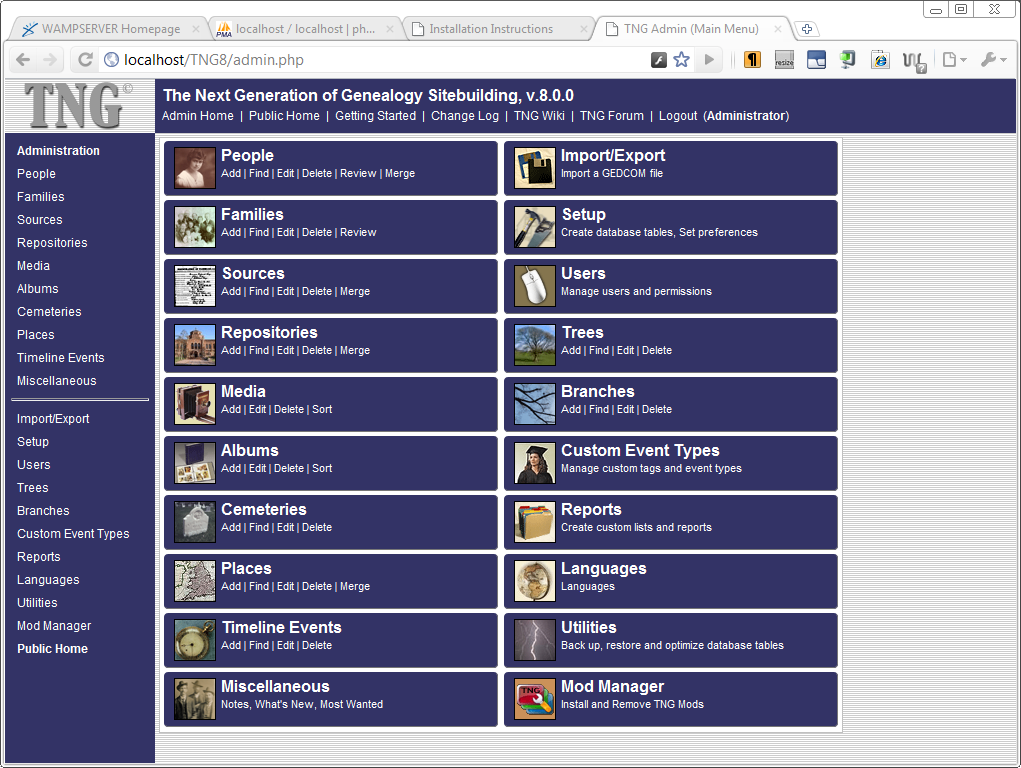
The Import/Export menu is the top right choice on the TNG Admin page.

The Import/Export GEDCOM page has several tabs, and opens on the Import tab.
Data must be imported into a Tree. If you did not create a Tree yet, you can do
so by choosing the Add New Tree button
.
The Choose File
button brings up a normal File Open dialog box. Once you
have selected a file, TNG shows it name after the button. The screenshot shows
that I selected the file AhnenNumbers.ged.
With just one Tree created, that Tree automatically becomes the destination to
import into. There are some interesting options on the page, but for a first try
the default settings will do.
Choosing the Import Data
will import the GEDCOM file.

Upon completion of the import, TNG shows a dialog with some statistics that includes the option to delete the GEDCOM file. For a desktop application, the option to delete the imported GEDCOM is rather odd, but for a web application it makes some sense. Many users of TNG do not want to keep the imported GEDCOM files on their server.
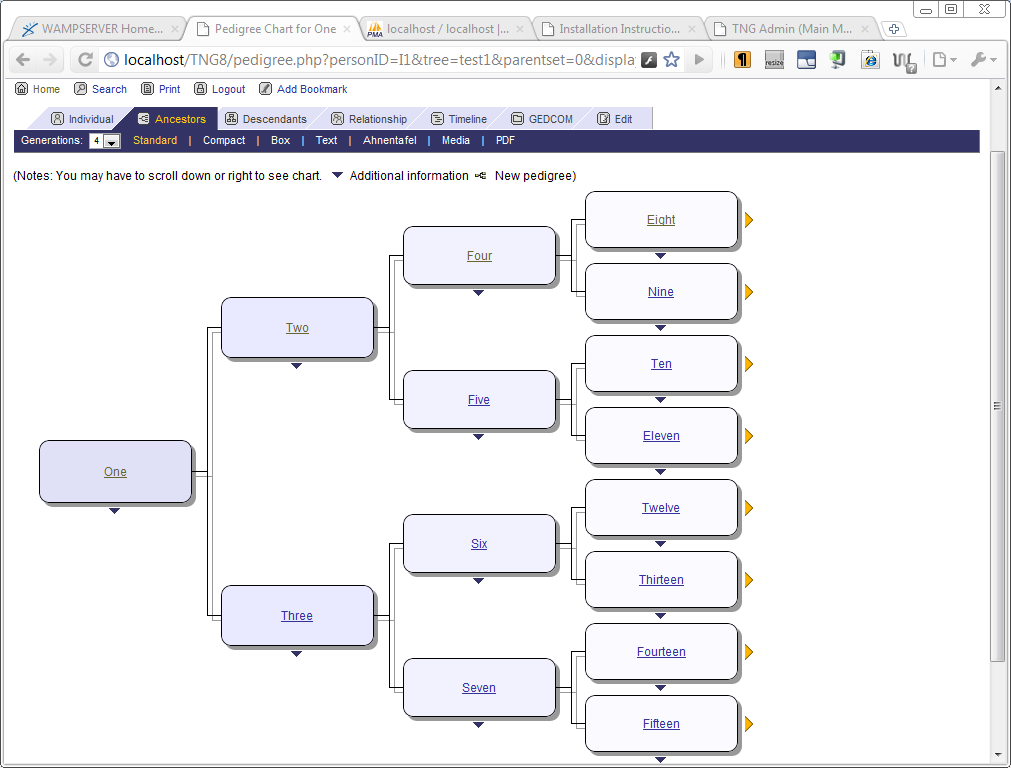
The nice thing about the AhnenNumbers database is that it very easy to navigate to individual One and display a pedigree chart.
updates
2012-02-08: TNG on Dreamhost
Kathleen Moore has done a blog post about installing TNG on Dreamhost.
links
- WAMP
- WampServer
- The Next Generation of Genealogy Sitebuilding (TNG)
- Two Huge GEDCOM Files
- Moore-Mays.org 2012-02-08: RMC: Creating a Database and Installing TNG
Copyright © Tamura Jones. All Rights reserved.